
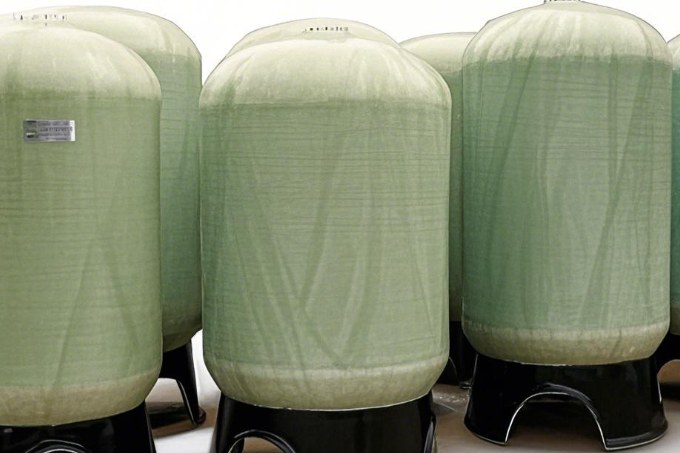
A filament-wound FRP storage tank can be perfectly manufactured and still fail early — because most FRP tank damage happens between the factory gate and the first fill. Dropped on a chain, rested on a point load, lifted by a nozzle or connected by a rigid steel pipe that never moves: each is a common way a tank that cost thousands arrives damaged or cracks within a season of service.
FRP is strong but not forgiving of the habits used for steel tanks. This guide covers the transport, site handling, foundation, connection and first-fill procedures that protect a fiberglass storage tank through its whole service life — written for buyers, site engineers and installation crews.
1. Transport: Support the Shell, Not the Fittings
- Cradle the body — the tank must ride on padded cradles or saddles spread along the shell (typically two supports, positioned near the quarter points), never on a single point or on its nozzles.
- No chains or bare straps over the laminate — use wide nylon webbing or padded bands; chains cut into FRP in seconds under vibration.
- Tie-downs at the saddles, not across the middle of the span, and protect every edge contact with rubber or foam.
- Keep internal bracing in place until the tank is set on its permanent supports — large diameters can ovalize in transit if the temporary cross-braces are removed early.
- Inspect on arrival before signing: walk the full circumference, check for cracks, gelcoat crazing, edge delamination and any flat spots, and photograph the tank from all four sides with the delivery note visible.
Buyer tip: agree a 48-hour inspection window with the carrier in the purchase contract. FRP damage is often invisible until the tank is filled — a signed clean receipt kills your claim.
2. Unloading and On-Site Storage
- Unload with a crane or forklift at the marked support points — never drag the tank, roll it over gravel or drop it off the truck tail.
- Store on level wooden blocks (two lines of support) on firm ground, away from vehicle traffic and weld sparks.
- Keep it shaded or covered if it will wait more than a few weeks — UV-stabilized gelcoat still benefits from protection, and covers stop dirt and birds nesting in open nozzles.
- An empty tank is a big sail: in windy areas, strap stored tanks down or partially ballast them.
3. Foundations and Supports
- Horizontal tanks must sit on properly designed saddles: follow the manufacturer's saddle count, width and end-overhang limits — an unsupported end or a single center saddle creates bending stresses the laminate was not designed for. A full-length concrete or steel cradle is ideal for soft soils.
- Vertical tanks need a flat, level base: a concrete pad with a tolerance of about 5 mm across the diameter, or a compacted, level gravel bed for smaller tanks. Never let the tank bottom bear only on its rim — it must be fully supported.
- Anchor against wind and seismic load where required, using the lugs or hold-down bands supplied — with corrosion-protected bolts and load-spreading plates under the nuts.
- Keep the foundation clear of standing water and slope it slightly so the area drains.
4. Lifting and Rigging Rules
- Lift only at the designated points — at factory lifting lugs if fitted, or with wide slings at the marked support positions using a spreader bar so sling angles stay close to vertical.
- Never lift by nozzles, flanges, vents or attached pipework — these are bonded on and will tear off under the tank's weight.
- Pad all sling edges; keep sling angles above 60° to avoid crushing the shell with horizontal force components.
- For tall vertical tanks, use a lifting frame that grips the top flange evenly, and guide the tank with tag lines — never push on the shell with bars.
5. Pipe Connections: Let the Tank Breathe
An FRP tank moves — it expands, contracts and, when filled, can settle a few millimeters. Piping that cannot flex transfers those forces straight into the nozzles:
- Support the pipework independently — pipe weight must never hang on the tank nozzle.
- Fit a flexible coupling or expansion joint on at least one side of the tank connection (especially on long, hot or rigid metal pipe runs).
- Torque flanged joints evenly in a star pattern to the stated value; FRP flanges will crack if overtightened one bolt at a time.
- Allow for thermal movement and for any foundation settlement with loops or offsets in the pipe layout.
Pair this with the correct vessel in the first place — see our FRP horizontal storage tanks, filament-wound industrial water tanks and chemical mixing tanks.
6. First Fill and Hydrotesting
- Fill gradually with water — 25 %, 50 %, 75 % and 100 %, pausing at each level to check supports for settlement and the shell for distortion or leaks.
- Vent fully — never hydrotest a closed tank against trapped air.
- Inspect joints, nozzles and flanges while filling; tighten weeping flanges only when depressurized.
- Hold the test level for the period in the manufacturer's procedure (commonly 24 hours for water, or the project's specified hold), recording any drop and the ambient temperature.
- After the test, empty promptly if the tank will not be commissioned, and never leave a fiberglass tank full of stagnant test water in freezing weather.
7. Site Installation Quick Checklist
| Stage | Check |
|---|---|
| Arrival | Visual damage scan + photos, paperwork signed after inspection |
| Unloading | Lift at marked points, padded slings, no dragging |
| Foundation | Level within ~5 mm, full base support, drainage, anchorage in place |
| Saddles (horizontal) | Correct count/width/position, no end overhang beyond spec |
| Connections | Pipework self-supported, flexible joint fitted, flanges torqued evenly |
| Hydrotest | Gradual fill, vents open, 24 h hold, joints leak-free, drained after |
8. Common Installation Mistakes
- Handling the tank like steel — chains, single-point lifting, dragging over gravel.
- Signing the delivery receipt before inspecting, forfeiting the damage claim.
- Rigid pipe connections that crack nozzles as the tank settles and breathes.
- Horizontal tanks on too few or wrongly placed saddles, causing shell bending fatigue.
- Skipping the staged fill, then blaming the tank when a support settles or a joint leaks under full load.
For bundled water and wastewater packages, an integrated FRP pump station arrives as one pre-tested unit; browse the full FRP storage tank and container range before you specify.
Need help selecting FRP products?
Our engineers answer technical questions free of charge.
Ask an Engineer on WhatsApp