
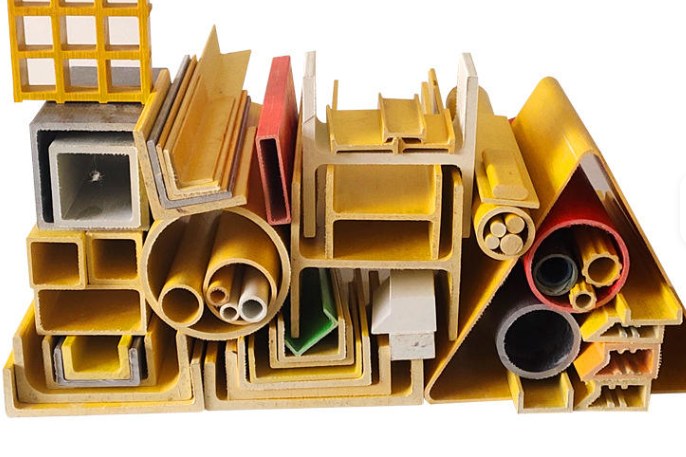
Standard angles, tubes and channels cover most structural work — until a profile must clip into a mating part, hide a cable, slot into a window system, or carry a very specific load. That is when custom pultrusion starts: your geometry, your die, your profile. This guide explains what custom pultrusion actually involves — tooling cost, realistic tolerances, why minimum order quantities exist and how to structure an RFQ so quotes come back comparable.
1. The Process in Sixty Seconds
Pultrusion pulls continuous glass fibres through a resin bath, then through a heated steel die where the composite cures into its final cross-section, emerging as a straight, constant-section profile cut to length. The die defines the shape; the fibre architecture (roving, mat, veil) defines the properties; the line speed and die temperature define the cure. Everything about cost and quality follows from those four variables — which is why a custom profile is a manufacturing decision, not just a drawing.
2. Tooling: What You Are Actually Buying
The "tooling" is a precision-machined die: hardened steel, cavity ground and polished to the profile geometry, with internal cores forming hollows. What you pay for:
- Die machining from your CAD profile — typically a 3–6 week lead time depending on complexity
- Resin system selection — polyester, isophthalic, vinyl ester — fixed before the die sees material
- Guide plates and forming guides that bring the fibres into the die in the right architecture
Dies last for very long production runs (hundreds of thousands of metres with maintenance), so tooling is an amortisation question, not a consumable — the reason MOQs exist.
3. Die Design Inputs That Change Everything
| Design input | Why it matters |
|---|---|
| Wall thickness (min ~1.5–2 mm typical) | Thinner walls cure unevenly and warp; extreme thinness needs special technique |
| Fillets and corners | Sharp internal corners stress-crack; generous radii (≥1.5 mm) run cleaner |
| Hollows and cores | Internal cores add tooling cost but enable clips, cable routes, stiffness |
| Symmetry | Asymmetric sections pull with residual bow — design shrinkage symmetry in |
| Surfacing veil | UV and colour live in the veil; chosen before first pull |
4. Tolerances: What Is Realistic
| Dimension | Typical tolerance |
|---|---|
| Outside dimensions (up to ~100 mm) | ±0.2 to ±0.5 mm |
| Wall thickness | ±15% of nominal (process-dependent) |
| Straightness (bow) | ~1 mm/m standard; tighter with post-straightening |
| Length cut | ±1–3 mm per saw station |
| Twist | Specified per metre for open profiles |
Rule of thumb: pultrusion holds good tolerances in the die direction and moderate tolerances across it. If your assembly needs ±0.1 mm everywhere, plan for machining critical features after pultrusion — that is normal practice, not a failure of the process.
5. Why Minimum Order Quantities Exist
An MOQ is not arbitrariness: the die cost must amortise, and the line must run long enough to reach stable quality (early metres of any new die are setup). Typical MOQs for custom profiles run from a few hundred metres for small sections to a few dozen lengths for large heavy sections — always volume, not weight, because the line is priced per metre pulled. Below the MOQ, most suppliers offer either a sample-die run at a fixed engineering charge, or a near-standard profile modified by secondary machining.
6. Prototyping and Validation
Sensible custom programs phase the risk: (1) CAD + FEA check of the section; (2) a short sample run on the production die for dimensional validation; (3) mechanical verification — bending, clip-fit, impact — against your load cases; (4) pilot batch, then release to volume. Ask upfront for the QC documents you will need in production (dimensional reports, Barcol hardness, glass content) so sampling validates those too.
7. Cost Structure and the Volume Break-Even
| Cost element | Behaviour with volume |
|---|---|
| Tooling (die + guides) | Fixed — amortised over total metres |
| Materials (glass + resin) | Near-linear; dominates at volume |
| Line time | Per metre; improves slightly with speed and yield |
| Secondary ops (cut, drill, machine) | Per piece; design can eliminate most |
Against alternatives, custom pultrusion breaks even quickly when it replaces assembled multi-piece brackets or machined metal — consolidation of parts usually pays the die back in the first production year.
8. RFQ Checklist: What to Send the Supplier
- Section drawing (CAD) with tolerances marked critical vs general
- Load cases and span/deflection requirements
- Resin system and surface requirements (colour, UV, fire rating)
- Annual and total volume forecast, delivery in release batches
- Cut lengths, drilling/machining, packaging
- Required QC certificates
9. Common Mistakes
- Designing to aluminum-extrusion tolerances and paying for machining you did not need.
- Sharp internal corners and paper-thin walls that no die runs cleanly.
- Quoting tooling without agreeing who owns the die.
- Skipping the sample-run validation, then arguing about "quality" at volume.
- Hiding volume forecast — MOQ and price both follow it.
Explore our pultruded angle profiles, custom-cut FRP profiles, the pultrusion production lines behind them and the full profiles & structural components range; related reading: pultruded profiles application guide and FRP manufacturing processes explained.
Need help selecting FRP products?
Our engineers answer technical questions free of charge.
Ask an Engineer on WhatsApp