
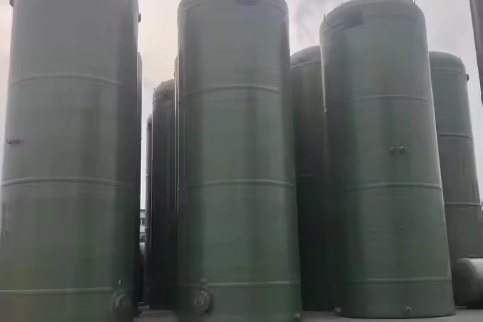
FRP tanks fail slowly and visibly — if you look. A crazed gelcoat, a scratch that exposes fibres, a blister the size of a coin: each is repairable in hours at a fraction of replacement cost, but only if it is caught before the chemical reaches the structural glass. Repairing FRP is a well-understood composite procedure; the mistakes happen when people use the wrong resin, skip surface preparation, or patch a structural crack as if it were cosmetic.
This guide explains how to assess FRP tank damage, which repairs are field-safe and which are not, the step-by-step surface and structural repair sequence, and when to call the factory instead of the toolbox.
1. Assess Before You Patch
Every repair starts with classification — cosmetic, liner, or structural:
| Damage | Signs | Repair level |
|---|---|---|
| Gelcoat crazing / scratches | Surface-only marks, no exposed fibres | Cosmetic — recoat surface |
| Liner damage | Exposed fibres visible, no through-wall crack | Liner patch with veil |
| Blistering | Lumps under the surface (osmosis or solvent) | Cut out, dry, refill with liner laminate |
| Crack / delamination | Through-wall or running between layers | Structural — assess, likely factory involvement |
Find the cause before repairing: the same impact point, an over-torqued flange, or a chemical the liner cannot handle will simply reproduce the damage on the repaired area.
2. The Golden Rule: Match the Resin System
An FRP repair fails when a polyester tank is patched with epoxy, or a vinyl ester liner is covered with a polyester filler that the chemical attacks. Determine the original resin (from the manufacturer's data or a burn test) and repair with the same resin family, matching the chemical-duty liner chemistry. Gelcoat repairs need the same grade of gelcoat, not paint.
3. Surface Preparation Is 80 % of the Repair
- Grind back damaged material with coarse abrasive until sound laminate is reached, and feather the edges of the repair area to a shallow taper so the patch has something to bond to.
- Dry the area — moisture is the enemy of composite bonds; warm the surface if needed.
- Clean with the correct solvent for the resin (acetone or MEK), and let it flash off completely.
- Work in a dry, warm environment; resin cure is moisture- and temperature-sensitive.
4. Liner and Cosmetic Repair Sequence
- For scratches and crazing: abrade, clean, and apply a matching gelcoat or resin-rich surfacing layer; cure and check hardness.
- For liner damage with exposed fibres: grind to sound liner, lay up a chemical-grade veil and resin to rebuild the liner, then finish with gelcoat.
- For blisters: cut out the blister and any wetted laminate behind it, dry thoroughly (osmosis blisters trap moisture), refill with liner laminate, and recoat.
5. Structural Patch: When the Wall Is Compromised
Through-wall cracks, impact holes and delamination in a pressure or liquid-head zone are structural repairs: they need the load path rebuilt with glass reinforcement, not just sealed:
- Grind and taper the damage over an area several times the defect size, so the patch overlaps sound laminate on all sides.
- Lay up successive layers of glass mat and woven roving (or the manufacturer's repair laminate) with the same resin, building back to the original wall thickness.
- Cure between layers where specified; finish with a chemical-duty liner and gelcoat on the wetted side.
- Hydrotest or leak-test the repaired area before returning the tank to service.
6. When to Call the Factory (and Not DIY)
- Large delamination or cracks in the hoop-stress zone of a pressure or large-diameter tank.
- Damage where the chemical has already wicked along the glass — the wetted zone is larger than it looks and needs expert assessment.
- Warranty-sensitive tanks: unauthorized repairs can void the manufacturer's warranty — check first.
- Inside-tank repairs: entry is confined-space work — vent, gas-test, and use a permit system before anyone enters.
7. Post-Repair Verification
- Check the cured repair with a Barcol hardness reading against the surrounding laminate (undercured resin reads soft).
- Spark-test liner repairs for pinholes where a spark tester is available.
- Hydrotest or fill staged, watching the repaired area for wet spots or distortion.
8. Repair Mistakes That Waste the Effort
- Patching with a different resin family — the patch fails, then the original damage returns.
- Repairing over a wet or contaminated surface — the bond never happens.
- Skipping the feathering and overlap, leaving a weak step that cracks again.
- Treating a structural crack as cosmetic and "sealing" it with gelcoat.
Prevention is cheaper than repair: schedule annual liner inspections, protect tanks from impact, and torque flanges to FRP values. For tank selection and care see the FRP storage tank range, the installation guide and the vertical tank guide.
Need help selecting FRP products?
Our engineers answer technical questions free of charge.
Ask an Engineer on WhatsApp